Quick Answer
How do you set up an AI phone agent or AI receptionist? Sign up for a no-code AI receptionist platform like OnCallClerk, pick a voice, write a short personality prompt, add 5 to 10 frequently asked questions, configure call rules, and assign a phone number. The whole process takes under 10 minutes for a single business and does not require any coding, hardware, or technical staff.
Best for: small businesses, solo operators, agencies setting up AI receptionists for clients, property managers, dentists, lawyers, plumbers, HVAC technicians, real estate agents, and any service business that misses calls.
Cost: Free 14-day trial, then plans start at around $50/month for 50 minutes of AI call handling. The savings calculator compares this to a human receptionist or traditional answering service.
The 6 setup steps:
| Step | Time | What You Do |
|---|---|---|
| 1. Create account | 1 min | Sign up with email or Google |
| 2. Choose a voice | 2 min | Pick from 9 natural-sounding AI voices |
| 3. Define personality | 2 min | Set tone, name, greeting, and system instructions |
| 4. Build knowledge base | 2 min | Add FAQs the agent should answer |
| 5. Configure call rules | 1 min | Set business hours, escalation, and transfer rules |
| 6. Assign a phone number | 1 min | Pick a local or toll-free number |
Total: 10 minutes from signup to a live AI phone agent answering calls 24/7.
Prefer to build with code? If you are a developer who wants programmatic control over agents, voices, prompts, and integrations rather than a no-code dashboard, see the OnCallClerk SDK and API reference. The SDK ships the same orchestration (latency, barge-in, prompt caching, reconnect logic) behind a single API and gets you to a working agent in days. For a deeper engineering walkthrough, read how to build a low latency AI phone agent.
The rest of this guide walks through every step in detail.
What Is an AI Phone Agent (and Do You Need One)?
An AI phone agent (also called an AI receptionist, virtual receptionist, voice AI agent, or AI call answering service) is software that answers your business phone, holds a real conversation with the caller using a large language model, and performs tasks like booking appointments, answering FAQs, capturing leads, and transferring urgent calls to a human. It runs 24/7, never goes on break, and costs a fraction of a human receptionist.
You should set one up if any of these are true for your business:
- You miss calls and lose leads after hours, on weekends, or during busy periods
- You answer the same routine questions (hours, pricing, services) over and over
- You pay for an answering service that takes messages but does not book or qualify
- You are an agency setting up phone coverage for multiple clients
- You run a property management, real estate, dental, legal, or service business with high call volume
- You want every call recorded, transcribed, and searchable for QA and compliance
If none of those apply, you probably do not need one yet. If two or more do, the math almost always works.
Your First AI Phone Agent in 10 Minutes
Setting up an AI-powered phone agent used to mean hiring a development team, licensing expensive call center software, and spending weeks on configuration and testing. Those days are over. With OnCallClerk, you can have a professional AI voice agent answering your business calls in under ten minutes - no coding, no technical background, no IT department required.
This guide walks you through every step of the process, from creating your account to hearing your agent pick up its first call. Whether you're a solo plumber who's tired of missing calls mid-job, a dental practice that needs after-hours coverage, or a growing e-commerce brand drowning in routine inquiries, this is your starting point.
What You'll Need Before You Begin
Not much, honestly. That's kind of the point. Here's the full list:
- An email address - for creating your OnCallClerk account (or you can sign up with Google)
- Basic business information - your business name, hours of operation, and the services you offer
- A rough idea of how you want your agent to sound - we'll help you with this, but it's good to have a sense of the tone you want (professional, friendly, casual, etc.)
- About 10 minutes of uninterrupted time - that's genuinely all it takes
You don't need an existing business phone number (we'll give you one), you don't need any software to install, and you don't need to prepare any technical documentation. If you can fill out an online form, you can set up an AI phone agent.
Step 1: Create Your Account (1 minute)
Head to oncallclerk.com/signup and you'll be greeted by a clean, three-step signup wizard.
Fill in Your Details
The first screen asks for the basics:
- First Name and Last Name
- Email Address - this becomes your login
- Company Name - the name of your business
- Phone Number - optional, but useful for account recovery
- Password - create something strong; you'll see a show/hide toggle so you can double-check what you've typed
You'll also need to agree to the Terms of Service and Privacy Policy. There's an optional checkbox if you'd like to receive product updates and tips - no spam, just genuinely useful content about getting the most from your agent.
Prefer to skip the form? Click Continue with Google to sign up with your Google account in one click.
Choose Your Plan
The second screen presents three plans:
- Basic - ideal for solo operators and very small businesses. You get 50 minutes of AI call handling per month, basic analytics, a standard greeting, and email support.
- Professional - the most popular choice, designed for growing businesses. 200 minutes per month, advanced analytics, custom greetings, CRM integration capabilities, and priority support.
- Enterprise - built for high-volume businesses. Unlimited minutes, the full analytics suite, support for multiple agents, API access, dedicated support, and custom integrations.
You can toggle between monthly and yearly billing - yearly saves you a meaningful chunk. Every plan starts with a 14-day free trial, so you won't be charged until you've had plenty of time to see your agent in action.
Confirm and Start Your Trial
The final screen shows your order summary. You'll see the plan you selected, the billing cycle, and a clear "$0.00" total confirming your trial. Payment is handled securely through Stripe, and you can cancel anytime during the trial period with no charges.
Click Start Free Trial and you're in.
Step 2: Choose a Voice for Your Agent (2 minutes)
Once you're in the dashboard, you'll land on the Agent Setup page. The first tab is Voice & Speech, and this is where you decide what your agent actually sounds like.
OnCallClerk offers nine distinct AI voices, each with its own personality and character. You're not choosing from a list of robotic text-to-speech options - these are natural, expressive voices that sound genuinely human.
Here's who you can choose from:
- Kevin - American male. Professional, warm, and articulate. A great all-rounder for business calls.
- Sarah - American female. Confident, friendly, and approachable. Popular with service businesses that want a welcoming first impression.
- Lucy - British female. Energetic, clear, and engaging. Adds a touch of sophistication for brands that want it.
- Jake - Australian male. Young, reliable, and professional. Natural and easygoing without being too casual.
- Dominic - American male. Elegant, sophisticated, and charming. Ideal for premium brands and professional services.
- Ava - American female. Elegant, sophisticated, and charming. Pairs well with luxury or boutique businesses.
- Elise - American female. Professional and friendly. A balanced, versatile choice.
- Ryan - American male. Professional and friendly. Clean and clear - works well for anything from tech support to healthcare.
- Jon - American male. Knowing and poised. Conveys confidence and authority - great for legal, financial, or consulting firms.
Each voice card has a Preview button so you can listen to a sample before committing. Click through a few, play the samples, and pick the one that feels most like your brand. You can always change it later.
Step 3: Define Your Agent's Personality (2 minutes)
Switch to the Personality tab. This is where you shape *how* your agent communicates, not just how it sounds.
Agent Name and Personality Type
First, give your agent a name - this is what it'll introduce itself as when it picks up the phone. Keep it to 23 characters or fewer. Something like "Alex," "Sam," or "Jordan" works well. You can also use a more branded name if it fits your business.
Next, choose a Personality Type from four options:
- Professional - formal, courteous, and business-focused. Best for law firms, financial services, medical practices.
- Friendly - warm, approachable, and conversational. Great for restaurants, salons, retail, and service businesses.
- Helpful - solution-oriented and proactive. Ideal for support-heavy businesses where callers need answers fast.
- Concise - brief, direct, and to-the-point. Perfect for high-volume businesses where efficiency matters most.
Custom Greeting
This is the first thing every caller hears. Write something natural and on-brand. For example:
"Hi there! Thanks for calling Riverside Dental. I'm Sam, your virtual assistant. How can I help you today?"
Or for a more formal setting:
"Thank you for calling Mitchell & Associates. My name is Alex. How may I direct your call?"
The placeholder text gives you a starting point, but make it yours. This single sentence sets the entire tone for the caller's experience.
System Instructions
This is the most powerful part of your agent's configuration, and it's worth spending an extra minute here. System instructions tell your AI agent exactly how to behave, what information to provide, and how to handle different situations.
Don't worry if you're not sure where to start - OnCallClerk provides Quick Start Templates for common business types:
- Real Estate Agent - handles property inquiries, viewing scheduling, and lead qualification
- Restaurant Reservations - manages table bookings, menu questions, and event planning
- Medical Practice - appointment scheduling and general health inquiries
- E-commerce Support - order inquiries, returns, and product information
Click any template to load a pre-written set of instructions, then customise it to match your specific business. The instructions panel includes helpful tips:
- Be specific about what the agent should and shouldn't do
- Include examples of how to handle common scenarios
- Define when to transfer calls to humans
- Specify the tone and personality you want
- Include any business-specific information or policies
Think of this as briefing a new receptionist on their first day. The more context you give, the better your agent performs.
Step 4: Build Your Knowledge Base (2 minutes)
The Knowledge Base tab lets you add frequently asked questions - the kind of routine queries that make up the bulk of most business calls.
Click Add New FAQ and enter a question and answer. For example:
Question: "What are your hours?"
Answer: "We're open Monday through Friday, 9 AM to 6 PM, and Saturday 10 AM to 2 PM. We're closed on Sundays and public holidays."
Question: "Do you offer free estimates?"
Answer: "Yes! We offer free estimates for all residential plumbing work. I can schedule one for you right now if you'd like."
Question: "What's your cancellation policy?"
Answer: "You can cancel or reschedule your appointment with at least 24 hours' notice at no charge. Late cancellations may be subject to a $25 fee."
Add as many as you need. Common starting points include:
- Business hours and location
- Services offered and pricing
- Cancellation and refund policies
- Payment methods accepted
- Service area or delivery zones
- Booking and availability questions
Each FAQ feeds directly into your agent's knowledge, so it can answer these questions instantly and accurately on every call. You can add, edit, or remove FAQs at any time as your business evolves.
Step 5: Configure Call Handling Rules (1 minute)
The Call Rules tab is where you set up the operational side of things: when your agent is active, how it handles escalation, and where to forward calls when needed.
Escalation Policy
Sometimes a caller needs to speak to a real person. The escalation policy controls when that happens:
- Never - the AI handles everything, no transfers
- Complex queries only - the AI recognises when it's out of its depth and offers to connect the caller (this is the default, and it's a good starting point)
- When requested - the AI only transfers if the caller explicitly asks for a human
- Always offer option - the AI proactively lets callers know they can speak to a person
If you set any option other than "Never," you'll provide an Escalation Phone Number - typically your mobile or a team member's number - where transferred calls go.
Business Hours
By default, your agent runs 24/7 - which is one of the biggest advantages of AI phone coverage. But if you'd prefer to handle calls yourself during business hours and let the AI cover evenings, weekends, and holidays, you can configure a custom schedule.
Toggle off 24/7 mode and you'll see:
- Operating Days - check or uncheck each day of the week
- Starting Time and Ending Time - set your hours (e.g., 09:00 to 18:00)
- Timezone - choose from major timezones including EST, CST, MST, PST, GMT, CET, JST, and AEST
When your agent isn't active, calls can be forwarded to a Forward Phone Number that you specify - your personal line, your office, or wherever you want calls to go during business hours.
Business Name
Enter your business name here so the agent has it available for the conversation context. This is separate from your company name on your account - handy if you operate multiple brands.
Step 6: Get Your Dedicated Phone Number (1 minute)
The final tab is Phone Number, and this is where everything comes together.
Searching for a Number
Select your country (currently United States, with UK, Canada, and Australia coming soon), and you'll see a list of available phone numbers sourced in real time. Each number shows:
- The number itself in a friendly format
- The region/city it's associated with
- Whether it's a Local or Toll-free number
- Its capabilities (voice, SMS, MMS)
You can filter numbers by area code (enter a 3-digit code like 212 for New York, 310 for Los Angeles, or 800 for toll-free) or search for numbers that contain specific digits if you want something memorable.
Assigning Your Number
Found one you like? Click to select it and confirm the assignment. A modal will remind you that number assignment is permanent for that agent - choose carefully. Once confirmed, your number is instantly active and your agent is ready to receive calls.
Your assigned number appears prominently in the Phone Number tab and on your Dashboard Overview, complete with a copy button for easy sharing.
Using Your Number
You have several options for how to deploy your new number:
- Use it as your primary business line - put it on your website, business cards, and Google Business Profile
- Forward your existing number to it - set up call forwarding with your current carrier so calls to your existing number ring your AI agent
- Use it for after-hours coverage only - forward calls to your AI number outside business hours using your carrier's conditional forwarding settings
You're Live!
That's it. Your AI agent is now answering calls on its dedicated phone number, 24 hours a day, 7 days a week. The first thing you should do? Call it yourself. Seriously - dial the number, have a conversation, test a few scenarios. Ask about your hours, try to book an appointment, see how it handles a question you didn't add to the FAQ.
It's a genuinely surprising experience the first time. The voice is natural, the responses are intelligent, and callers get the same consistent, professional experience whether they call at 2 PM or 2 AM.
What You'll See in Your Dashboard
Once calls start coming in, your dashboard becomes your command center.
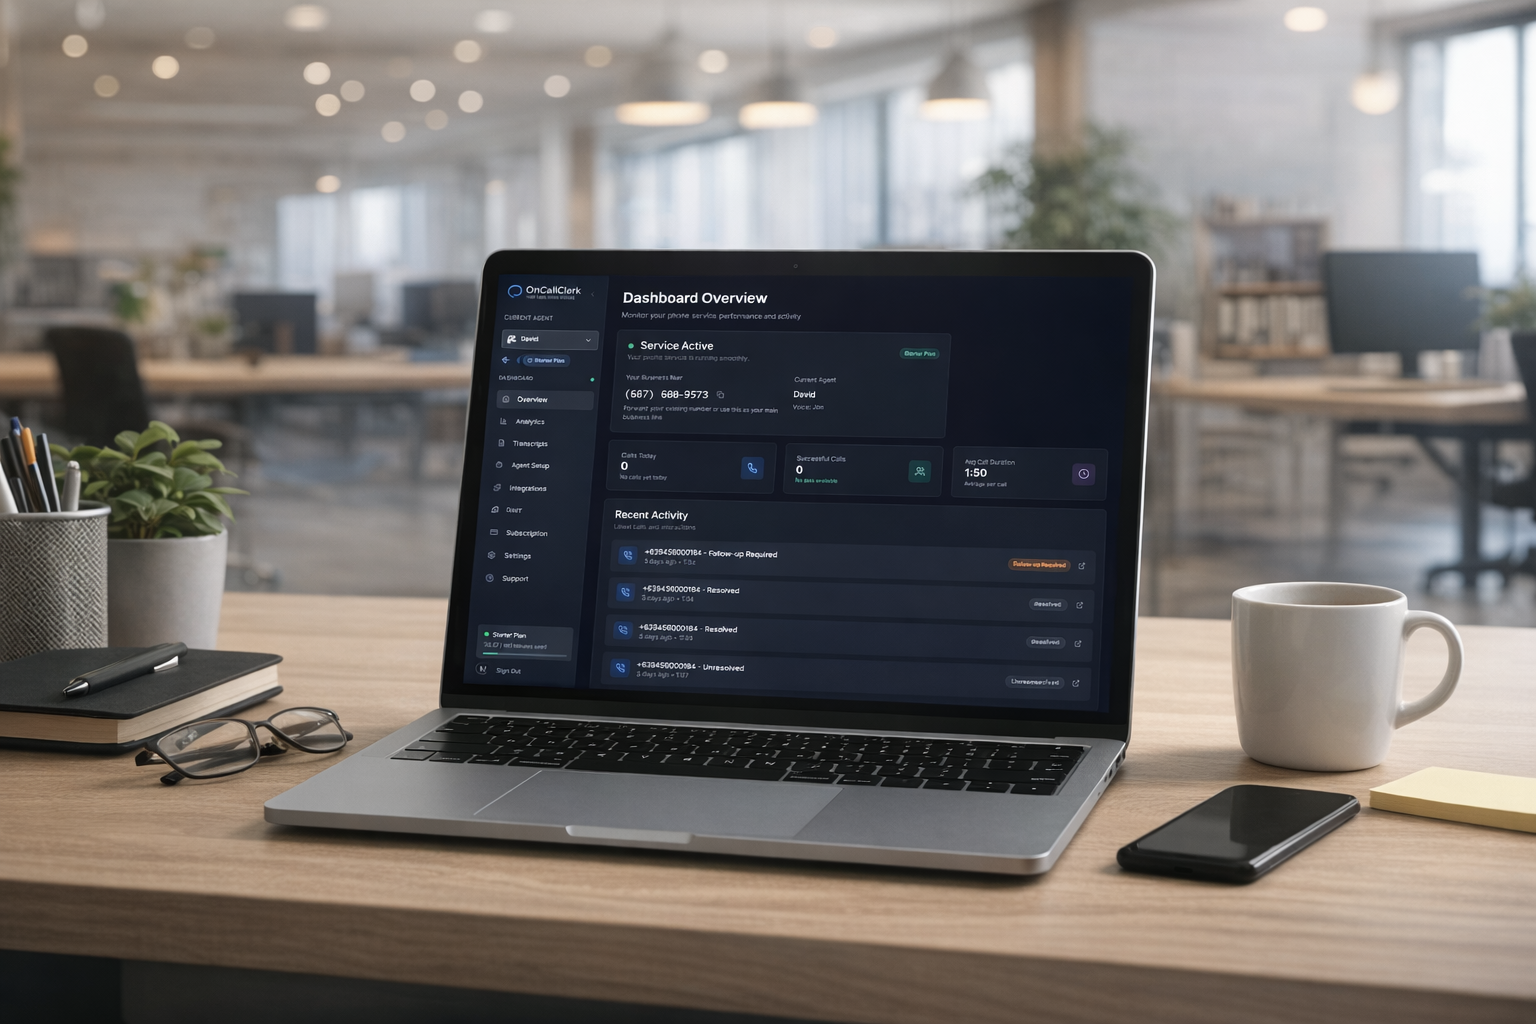
Overview
The Overview page gives you an at-a-glance snapshot of your phone service:
- Service Status - a live indicator showing your agent is active and ready
- Your Business Number - displayed prominently with a quick-copy button
- Current Agent - which agent is active and which voice it's using
- Today's Stats - calls today, successful calls and success rate, average call duration, and total minutes used
- Recent Activity - the last several calls with timestamps, caller numbers, outcomes, and durations
Transcripts
Every single call is automatically transcribed and stored. You can:
- Search transcripts by keyword - looking for everyone who mentioned "emergency" or "pricing"? Just search for it
- Filter by category - narrow down by call type (Sales Inquiry, Support Request, Booking, Complaint, etc.) or outcome (Resolved, Lead Captured, Escalated, Follow-up Required)
- Read full conversations - see the complete back-and-forth between your agent and the caller, with each message labeled by role
- Download transcripts - export individual call transcripts or bulk-export everything as text files
This is data that most businesses never capture. Every phone conversation your business has ever had, fully searchable and reviewable.
Analytics
The Analytics page turns your call data into actionable insights:
- Call volume trends - see how many calls you're getting by day, week, or month
- Answer rate - what percentage of calls your agent successfully handles
- Average duration - how long your typical call lasts
- Leads generated - how many calls resulted in a captured lead
- Hourly distribution - discover when your busiest calling hours are (you might be surprised)
- Conversion metrics - track how calls translate into business outcomes
You can filter by date range (7, 30, or 90 days) and export everything to CSV for deeper analysis or reporting. These are the kind of insights that used to require expensive call-centre analytics platforms - now they're built into every OnCallClerk plan.
Connecting Integrations
Once your agent is live and handling calls, you can supercharge it by connecting it to the tools your business already uses. Head to the Integrations page in your dashboard.
Google Calendar
Connect your Google Calendar and your agent can check real-time availability and book appointments directly during a call. No double-bookings, no "let me check and call you back." You can configure:
- Which calendar to use
- Buffer time between appointments (default: 15 minutes)
- Default appointment duration (default: 30 minutes)
Setup takes about one minute via Google OAuth.
Gmail
Link your Gmail account and your agent can send follow-up emails to callers immediately after a conversation - confirmations, pricing information, directions, or whatever you need. A caller asks about your services, and before they've hung up, a personalised email lands in their inbox.
Google Sheets
Connect a Google Sheet for automatic data logging. Every call, every lead, every appointment - automatically recorded in a spreadsheet you can share with your team, import into other tools, or use for reporting.
API Integrations (Fetch & Send Data)
For businesses with more advanced needs, OnCallClerk supports two types of API integrations:
- Fetch Data - your agent can pull information from any external API during a call. Check inventory, look up order statuses, verify account details - all in real time while the caller is on the line.
- Send Data - push structured data to external endpoints. Feed new leads directly into your CRM, trigger workflows in your project management tool, or update records in your backend system.
Both support custom headers, query parameters, and request body schemas. If you can reach it with an API, your agent can talk to it.
Coming Soon
Integrations with Slack, Calendly, HubSpot, Stripe, Zapier, and Shopify are on the roadmap - each designed to make your agent an even more seamless part of your tech stack.
Pro Tips for Getting the Most Out of Your Agent
1. Test Like a Customer
Call your own number with different scenarios. Ask tricky questions. Try to confuse it. See how it handles edge cases. The more you test early on, the better your agent performs from day one.
2. Review Your First Transcripts Carefully
After your first 10-20 calls, read through the transcripts. You'll quickly spot patterns: questions your agent stumbled on, information it's missing, or phrasing that could be more natural. Use these insights to refine your system instructions and add new FAQs.
3. Start with Your Top 10 FAQs
You don't need to document everything upfront. Start with the ten questions you hear most often and add more over time. Your analytics and transcripts will tell you exactly what callers are asking about, so you can fill gaps based on real data rather than guessing.
4. Use the Analytics to Find Hidden Opportunities
Pay attention to when calls spike, what topics come up most, and which calls result in leads. You might discover that 30% of your calls happen after 6 PM when you're currently closed - that's revenue your agent is now capturing. Or that a service you barely promote generates a ton of phone inquiries - that's a marketing signal.
5. Set the Right Escalation Policy
"Complex queries only" is the default for a reason - it gives your agent the freedom to handle routine calls independently while ensuring genuinely tricky situations get a human touch. Start there and adjust based on what you see in your transcripts.
6. Keep Your Instructions Updated
As your business changes - new services, updated pricing, seasonal hours - update your agent's system instructions and FAQs to match. It takes less than a minute, and it ensures your callers always get accurate information.
Managing Multiple Agents
On the Professional plan (up to 3 agents) and Enterprise plan (up to 10 agents), you can create separate AI agents for different business lines, locations, or purposes. Each agent gets its own:
- Voice and personality
- System instructions and FAQ library
- Phone number
- Call rules and business hours
- Integrations
- Analytics and transcripts
Switch between agents using the dropdown at the top of your dashboard sidebar. Creating a new agent is quick - give it a name, choose an agent type (Real Estate, Customer Support, Restaurant, Medical Practice, E-commerce, or Custom), and OnCallClerk auto-generates a starting system prompt and greeting based on the type. Then customise from there.
The Bottom Line
Ten minutes. That's the distance between where you are now - missing calls, losing leads, scrambling to cover the phones - and having a professional, intelligent AI agent handling every call with consistency and care.
No developers. No infrastructure. No six-figure contracts. Just a straightforward setup that works from the moment you flip the switch.
The businesses that are adopting AI voice agents today aren't doing it because it's trendy - they're doing it because the maths is obvious. Better coverage, lower costs, happier customers, and data from every conversation that drives smarter decisions.
Your 14-day free trial starts the moment you sign up. No credit card required. No commitment. Just get started and see what your business sounds like when it never misses a call.
Frequently Asked Questions
How do I set up an AI receptionist for my business?
Sign up at oncallclerk.com, choose a voice, write a short personality prompt and greeting, add your most common FAQs, configure call hours and escalation rules, and assign a phone number. The full process takes under 10 minutes and requires no coding or technical setup. You get a 14-day free trial with no credit card required.
Do I need to be technical to set up an AI phone agent?
No. Modern AI receptionist platforms like OnCallClerk are fully no-code. If you can fill out an online form, you can set up an AI phone agent. There is no software to install, no servers to configure, and no developers required.
How long does it take to set up an AI receptionist?
About 10 minutes for a single business. Agencies setting up AI receptionists for multiple clients typically spend 5-7 minutes per additional client after the first one, since most settings can be cloned from a template.
Can I keep my existing business phone number?
Yes. You can either use your new OnCallClerk number as your primary line, forward your existing number to it through your current carrier, or set up conditional forwarding so only after-hours calls reach the AI. Number porting from your existing carrier is also supported.
What does an AI phone agent cost?
Plans start at around $50/month for 50 minutes of AI call handling on the Basic plan, $99/month for the Professional plan with 200 minutes and CRM integration, and custom pricing for Enterprise with unlimited minutes and multiple agents. All plans include a 14-day free trial. Compare against the typical $2,000-$3,000/month for a human receptionist or $200-$1,000/month for a traditional answering service.
Will the AI sound like a robot?
Not if you set it up right. OnCallClerk uses streaming TTS voices that sound natural and expressive. The 9 voices available include male and female options across American, British, and Australian accents. Most callers cannot tell they are talking to an AI on the first call.
Can the AI book appointments?
Yes. Connect your Google Calendar (or a custom API endpoint) and the agent checks real-time availability and books appointments directly during the call. No double-bookings and no "let me check and call you back".
Can the AI transfer calls to a human?
Yes. The escalation policy controls when transfers happen. The default "complex queries only" setting lets the AI handle routine calls and transfers genuinely tricky situations to a human. You can also set it to transfer on demand or proactively offer the option on every call.
Does the AI work after hours?
Yes. By default, the agent runs 24/7. You can also configure custom hours so it only handles after-hours, weekends, holidays, or whatever schedule you want. This is one of the biggest unlocks for service businesses that miss evening and weekend calls.
Can I use one AI agent for multiple businesses?
The Professional plan supports up to 3 agents and the Enterprise plan supports up to 10. Each agent has its own voice, personality, FAQs, phone number, and integrations. This is how agencies set up AI receptionists for multiple clients under a single OnCallClerk account.
What languages are supported?
The AI handles English natively across multiple accents (American, British, Australian). Additional language support is on the roadmap. Check the pricing page for current language coverage.
Can the AI integrate with my CRM or booking system?
Yes. OnCallClerk supports Google Calendar, Gmail, and Google Sheets out of the box, plus custom API integrations to fetch data (check inventory, look up orders) and send data (push leads to a CRM, trigger workflows). If you can reach a system through an HTTPS API, the agent can talk to it.
How is this different from hiring an AI agency to build a custom phone agent?
A custom build (described in How to Build an AI Phone Agent) typically takes 2 to 6 months and costs $20,000 to $200,000 in engineering time before it goes live. A no-code AI receptionist setup with OnCallClerk takes 10 minutes and starts at around $50/month. For 95% of businesses, the no-code path is the right answer. If you are a developer and want code-level control without the multi-month build, the OnCallClerk SDK is the middle ground.
How is this different from a traditional answering service?
Traditional answering services use human operators who take messages and pass them along. They are limited by staffing, costs, and hours of coverage. An AI receptionist is available 24/7, costs a fraction of the price, books appointments directly, integrates with your other systems, and gives you a searchable transcript of every call. See AI Receptionist vs Human Answering Service for the detailed comparison.
Setting Up an AI Receptionist for Your Agency Clients
If you are a marketing agency, IT consultancy, or business services firm setting up AI phone agents for multiple clients, the workflow is essentially the same as above with a few additions:
- Use one OnCallClerk account per client OR a single agency account with multiple agents. Both work. Multiple-agents-under-one-account simplifies billing; per-client accounts simplify access control.
- Build a template per industry. Once you have set up a real estate agent, you can clone its settings for the next real estate client and only update the FAQs and business name.
- Set up your branded reseller motion. Visit our resell AI receptionists page for the partnership program if you want to sell AI receptionists under your own brand.
- Use the analytics across all agents. Each agent reports independently, so you can show each client their own call data without exposing other clients' numbers.
Most agencies can ship a new client's AI receptionist in 5 to 7 minutes once they have done the first one.
Keep Reading
- How to Build a Low Latency AI Phone Agent - The developer/SDK path for custom builds
- How to Hire an AI Receptionist - A deeper evaluation framework for choosing the right AI receptionist.
- The Real Cost Savings of AI Receptionists - See exactly how much you save compared to traditional phone answering.
- How to Start an AI Call Center - Scale from one agent to a full AI call center business.
- AI Receptionist vs Human Answering Service - Side-by-side comparison.
See our virtual receptionist and Call Clerk pages, or explore industry-specific setups for plumbers, HVAC technicians, and property managers.